Ansible 模块

https://docs.ansible.com/ansible/latest/module_plugin_guide/index.html

模块的概念

Modules (also referred to as “task plugins” or “library plugins”) are discrete units of code that can be used from the command line or in a playbook task. Ansible executes each module, usually on the remote managed node, and collects return values. In Ansible 2.10 and later, most modules are hosted in collections.

模块(也称为“任务插件”或“库插件”)是可以从命令行或在剧本任务中使用的离散代码单元。Ansible通常在远程托管节点上执行每个模块,并收集返回值。在Ansible 2.10及更高版本中,大多数模块都托管在集合中。

Ansible中提供的模块(Module),每个模块对应一个功能。通常来说,执行一个任务的本质就是执行一个模块。

ansible 模块的帮助

ansible-doc -h

-l, –list List available plugins 查看可用的模块
-s, –snippet Show playbook snippet for specified plugin(s) 获取指定模块的信息

ansible -h

-a MODULE_ARGS, –args MODULE_ARGS
module arguments

-e EXTRA_VARS, –extra-vars EXTRA_VARS
set additional variables as key=value or YAML/JSON, if
filename prepend with @

使用ansible-doc -l 列举模块

以copy 模块举例

详细用法为 ansible-doc copy

查看模块参数 ansible-doc -s copy

如下删除本机文件命令示例:

ansible localhost -m file -a ‘path=/tmp/passwd state=absent’

通过Ansible删除本地文件/tmp/passwd。需要使用的模块是file模块,file模块的主要作用是创建或删除文件/目录。

ansible很多模块供了一个state参数,它是一个非常重要的参数。它的值一般都会包含present和absent两种状态值(并非一定),不同模块的present和absent状态表示的含义不同,但通常来说,present状态表示肯定、存在、会、成功等含义,absent则相反,表示否定、不存在、不会、失败等含义。

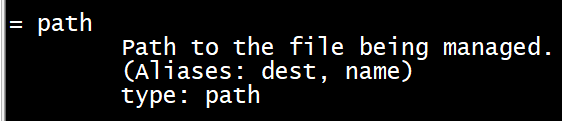
参数前有“=”是强制参数如file 模块的path 参数

ansible 调试模块debug

debug模块的用法非常简单,就两个常用的参数:msg参数和var参数。这两个参数是互斥的,所以只能使用其中一个。msg参数可以输出字符串,也可以输出变量的值,var参数只能输出变量的值。

设置变量str 输出变量值。

注意上面示例中的msg="hello {{str}}",Ansible的字符串是可以不用引号去包围的,例如msg=hello是允许的,但如果字符串中包含了特殊符号,则可能需要使用引号去包围,例如此处的示例出现了会产生歧义的空格。此外,要区分变量名和普通的字符串,需要在变量名上加一点标注:{{}}包围Ansible的变量,这其实是Jinja2模板(如果不知道,先别管这是什么)的语法。其实不难理解,它的用法和Shell下引用变量使用$符号或${}是一样的,例如echo "hello ${var}"

Ansible 配置文件

安装目录如下(yum安装):
  配置文件目录:/etc/ansible/
  执行文件目录:/usr/bin/
  Lib库依赖目录:/usr/lib/pythonX.X/site-packages/ansible/
  Help文档目录:/usr/share/doc/ansible-X.X.X/
  Man文档目录:/usr/share/man/man1/

ansible配置文件查找顺序

  ansible与我们其他的服务在这一点上有很大不同,这里的配置文件查找是从多个地方找的,顺序如下:

  1. 检查环境变量ANSIBLE_CONFIG指向的路径文件(export ANSIBLE_CONFIG=/etc/ansible.cfg);
  2. ~/.ansible.cfg,检查当前目录下的ansible.cfg配置文件;
  3. /etc/ansible.cfg检查etc目录的配置文件。

Ansible include/import

使用include还是import?

将各类文件分类存放后,最终需要在某个入口文件去汇集引入这些外部文件。加载这些外部文件通常可以使用include指令、include_xxx指令和import_xxx指令,其中xxx表示内容类型。

在早期Ansible版本,组织文件的方式均使用include指令,但随着版本的更迭,Ansible对这方面做了更为细致的区分。虽然目前仍然支持include,但早已纳入废弃的计划,所以现在不要再使用include指令,在后文中我也不会使用include指令。

对于playbook(或play)或task,可以使用include_xxximport_xxx指令:

  • (1).include_tasks和import_tasks用于引入外部任务文件;
  • (2).import_playbook用于引入playbook文件;
  • (3).include可用于引入几乎所有内容文件,但建议不要使用它;

对于handler,因为它本身也是task,所以它也能使用include_tasksimport_tasks来引入,但是这并不是想象中那么简单,后文再细说。

对于variable,使用include_vars(这是核心模块提供的功能)或其它组织方式(如vars_files),没有对应的import_vars

对于后文要介绍的Role,使用include_roleimport_roleroles指令。

既然某类内容文件既可以使用include_xxx引入,也可以使用import_xxx引入,对于我们来说,就有必要去搞清楚它们有什么区别。本文最后我会详细解释它们,现在我先把结论写在这:

  • (1).include_xxx指令是在遇到它的时候才加载文件并解析执行,所以它是动态解析的;
  • (2).import_xxx是在解析playbook的时候解析的,也就是说在执行playbook之前就已经解析好了,所以它也称为静态加载。

include和import 引入 举例

用示例来解释会非常简单。假设,两个playbook文件pb1.yml和pb2.yml。

pb1.yml文件内容如下:

---
- name: play1
  hosts: localhost
  gather_facts: false
  tasks:
    - name: task1 in play1
      debug:
        msg: "task1 in play1"

  # - include_tasks: pb2.yml
    - import_tasks: pb2.yml

pb2.yml文件内容如下:

- name: task2 in play1
  debug: 
    msg: "task2 in play1"

- name: task3 in play1
  debug: 
    msg: "task3 in play1"

执行pb1.yml:

$ ansible-playbook pb1.yml

上面是在pb1.yml文件中通过import_tasks引入了额外的任务文件pb2.yml,对于此处来说,将import_tasks替换成include_tasks也能正确工作,不会有任何影响。

但如果是在循环中(比如loop),则只能使用include_tasks而不能再使用import_tasks

Ansible sshd 配置

知识点:notify、handlers

---
- name: modify sshd_config
  hosts: new
  gather_facts: false
  tasks:
    # 1. 备份/etc/ssh/sshd_config文件
    - name: backup sshd config
      shell: 
        /usr/bin/cp -f {{path}} {{path}}.bak
      vars: 
        - path: /etc/ssh/sshd_config

    # 2. 设置PermitRootLogin no
    - name: disable root login
      lineinfile: 
        path: "/etc/ssh/sshd_config"
        line: "PermitRootLogin no"
        insertafter: "^#PermitRootLogin"
        regexp: "^PermitRootLogin"
      notify: "restart sshd"

    # 3. 设置PasswordAuthentication no
    - name: disable password auth
      lineinfile: 
        path: "/etc/ssh/sshd_config"
        line: "PasswordAuthentication no"
        regexp: "^PasswordAuthentication yes"
      notify: "restart sshd"

  handlers: 
    - name: "restart sshd"
      service: 
        name: sshd
        state: restarted

这里使用了shell模块中的creates参数,它表示如果其指定的文件/tmp/only_once.txt存在,则不执行shell命令,只有该文件不存在时才执行。这就是保证幂等性的一种体现:既然不能保证多次执行shell命令的结果不变,那就保证只执行一次。

Ansible提供了notify指令和handlers功能。如果在某个task中定义了notify指令,当Ansible在监控到该任务changed=1时,会触发该notify指令所定义的handler,然后去执行handler(不是触发后立即执行,稍后会解释)。所谓handler,其实就是task,无论在写法上还是作用上它和task都没有区别,唯一的区别在于handler是被触发而被动执行的,不像普通task一样会按流程正常执行。

唯一需要注意的是,notify和handlers中任务的名称必须一致。比如notify: "restart nginx",那么handlers中必须得有一个任务设置了name: restart nginx

此外,在上面的示例中,两个lineinfile任务都设置了相同的notify,但Ansible不会多次去重启sshd,而是在最后重启一次。实际上,Ansible在执行完某个任务之后并不会立即去执行对应的handler,而是在当前play中所有普通任务都执行完后再去执行handler,这样的好处是可以多次触发notify,但最后只执行一次对应的handler,从而避免多次重启。

Ansilbe shell模块颁发密钥

shell 模块分发密钥

---
- name: configure ssh connection
  hosts: nodes
  gather_facts: false
  connection: local
  tasks:
    - name: configure ssh connection
      shell: |
        ssh-keyscan {{inventory_hostname}} >>~/.ssh/known_hosts
        sshpass -p'Thtf#997' ssh-copy-id root@{{inventory_hostname}}

Ansible 防火墙设置

知识点:

如果使用Ansible去远程配置防火墙规则,方式有好几种,比如:
(1).可以通过shell模块远程执行iptables命令;
(2).可以在Ansible本地端写好iptables规则,然后传送到目标节点上通过iptables-restore来恢复规则;
(3).可以使用Ansible提供的iptables模块来远程设置防火墙规则。

下面是使用shell模块远程执行iptables命令来定义基本的防火墙规则。

---
- name: set firewall
  hosts: new
  gather_facts: false
  tasks: 
    - name: set iptables rule
      shell: |
        # 备份已有规则
        iptables-save > /tmp/iptables.bak$(date +"%F-%T")
        # 给它三板斧
        iptables -X
        iptables -F
        iptables -Z

        # 放行lo网卡和允许ping
        iptables -A INPUT -i lo -j ACCEPT
        iptables -A INPUT -p icmp -j ACCEPT

        # 放行关联和已建立连接的包,放行22、443、80端口
        iptables -A INPUT -m state --state ESTABLISHED,RELATED -j ACCEPT
        iptables -A INPUT -p tcp -m tcp --dport 22 -j ACCEPT
        iptables -A INPUT -p tcp -m tcp --dport 443 -j ACCEPT
        iptables -A INPUT -p tcp -m tcp --dport 80 -j ACCEPT

        # 配置filter表的三链默认规则,INPUT链丢弃所有包
        iptables -P INPUT DROP
        iptables -P FORWARD DROP
        iptables -P OUTPUT ACCEPT

可以指定要禁用或放行的端口列表,然后通过循环的方式去配置相关规则,还可以指定协议,指定链的默认规则等等。

此处,我做个简单演示,只支持三种操作:
1.允许用户指定filter表中三链的默认规则
2.允许用户指定INPUT链放行的tcp端口号列表
3.允许执行用户指定的iptables

---
- name: set firewall
  hosts: new
  gather_facts: false
  vars: 
    allowed_tcp_ports: [22,80,443]
    default_policies:
      INPUT: DROP
      FORWARD: DROP
      OUTPUT: ACCEPT
    user_iptables_rule: 
      - iptables -A INPUT -p tcp -m tcp --dport 8000 -j ACCEPT
      - iptables -A INPUT -p tcp -m tcp --dport 8080 -j ACCEPT

  tasks: 
    - block: 
      - name: backup and empty rules
        shell: |
          # 备份已有规则,并清空规则等
          iptables-save > /tmp/iptables.bak$(date +"%F-%T")
          iptables -X
          iptables -F
          iptables -Z

      - name: green light for lo interface and icmp protocol
        shell: |
          # 放行lo接口、ping和已建立连接的包
          iptables -A INPUT -i lo -j ACCEPT
          iptables -A INPUT -p icmp -j ACCEPT
          iptables -A INPUT -m state --state ESTABLISHED,RELATED -j ACCEPT

      # 放行用户指定的tcp端口列表
      - name: allow for given tcp port
        shell: iptables -A INPUT -p tcp -m tcp --dport {{item}} -j ACCEPT
        loop: "{{ allowed_tcp_ports | default([]) }}"

      # 执行用户自定义的iptables命令
      - name: execute user iptables command
        shell: "{{item}}"
        loop: "{{user_iptables_rule | default([]) }}"

      # 设置filter表三链的默认规则
      - name: default policies for filter table
        shell: iptables -P {{item.key}} {{item.value}}
        loop: "{{ query('dict', default_policies | default({})) }}"

上面示例中,定义了三个变量,分别用于存放用户指定要放行的tcp端口、filter表中三链的默认规则以及用户自定义的iptables命令。这没什么可解释的,但需要注意的是有些task中使用了类似{{ allowed_tcp_ports | default([]) }}的代码,这表示当变量allowed_tcp_ports未定义时,则将该变量设置为空列表作为其默认值,以免因变量未定义而loop循环出错。对于本示例来说,直接使用{{ allowed_tcp_ports }}也是健壮的代码。